Affiliate links on Android Authority may earn us a commission.Learn more.
Add Facebook and Twitter authentication to your apps, using Firebase and Fabric
July 27, 2025
User authentication can be a powerful addition to your Android app. Once you can identify the individual people who are using your app, you can customize your app’s content, potentially delivering an experience that feels as though it was designed with a specific user in mind.
But authentication isn’t just a way of delivering a more compelling, highly-personalized user experience. Depending on the kind of app you’re creating, the ability to identify your users may be required for your app to function at all – good luck developing a chat, email or social media app if you have absolutely no way of telling who anyone is!

Traditionally, authentication has required the user to complete a registration form, usually creating a username and password in the process. However, with the rise of social networks there’s now a much quicker and easier way of getting users signed into your app: using an account they’ve already created with an external authentication provider, such as Facebook or Twitter.
In this tutorial, I’m going to show you how to replace the time-consuming and frustrating user registration form, with a simple ‘Sign in with Facebook’ or ‘Sign in with Twitter’ button, using Firebase Authentication and the Fabric platform.
Introducing Firebase Authentication
User authentication has the potential to greatly improve the user experience, but implementing this functionality has traditionally required you to setup your own servers and design a custom authentication system. This authentication system must be capable of verifying the user’s credentials and storing them securely, but it also needs to handle all the miscellaneous tasks that surround authentication, such as managing password reset requests. Even after you’ve got everything up and running, the hard work is far from over as your system and servers will require ongoing maintenance and updates if they’re going to continue running smoothly.
To help you add authentication to your app without having to implement your own servers and systems, in this tutorial we’re going to be using Firebase Authentication, a backend-as-service (BaaS) platform that effectively provides servers and an authentication system out-of-the-box, leaving you free to focus on what really matters: providing a great experience once your users have signed in.

The other major benefit of using Firebase Authentication, is that it’s designed to play nicely with other Firebase services, so once you’ve implemented Authentication you’ll be in an ideal position to use additional Firebase services. In particular,Firebase Cloud Storagecan help you store and deliver user-generated content, and you may useFirebase Realtime Database Rulesto control the information your authenticated users have access to, as well as the actions they can perform, for example if you’re developing an email app then you can use Database Rules to prevent users from reading emails that aren’t addressed to them.
Why should I care about user authentication?
Firebase Authentication may remove a lot of the complexity that’s traditionally surrounded user authentication, but adding authentication to your app is still a multi-step process.
To help you decide whether giving users the ability to log into your app with their existing Twitter or Facebook credentials really is worth the time and effort, let’s take an in-depth look at some of the ways in which authentication can improve the user experience.
1. It’s theonlyway you can personalize the user experience
Once you’ve identified a user, you can potentially customize every part of your app to provide a better experience for that specific user. For example, you might filter your app’s content based on the user’s location or the pages they’ve liked on Facebook, or you might move their most frequently-used actions to the top of your application’s menus. Even something as simple as importing the user’s profile picture can add to the overall user experience.
As a general rule, the more information you have access to, the more closely you’re able to tailor the user experience. This is where external authentication providers have a huge advantage: if the user signs in via a social network then your app will have access to much more information, compared to if the user signed in with their email address. For example, if a user signs in with Facebook then your app will potentially have access to information ranging from their date of birth, to their location, work history, friends list, and all the pages they’ve liked, which is a huge amount of information to work with.

2. It’s far easier than filling in a registration form
Performing any lengthy or complex interactions on the smaller screen of a smartphone or tablet is a frustrating experience, particularly since we tend to use our mobile devices on the go. With his in mind, your users probably aren’t going to be thrilled by the prospect of completing a lengthy registration form before they can evenstartusing your app.
Authenticating your users via an external provider like Facebook or Twitter allows you to replace the frustrating and time-consuming registration form with a quick and easy, one-tap ‘Sign in with Twitter/Facebook’ button. Plus, allowing the user to log in with their existing credentials means that your app isn’t adding to the long list of passwords they’re probably already struggling to remember on a day-to-day basis.
3. It gives you the chance to re-engage users who’ve uninstalled your app
Once you’ve authenticated a user, you typically have a way of communicating with that user outside of the application context. This may not seem like a big deal when you can just communicate with a user inside your application via things like dialogs and notifications, but it becomes invaluable if that user ever decides to uninstall your app. Since you still have a way of communicating with them, there’s still a chance that you can re-engage them, for example if you have access to the email address associated with a user’s Facebook account, then you might decide to send them an email when you next update your app, just to make sure they’re fully aware of all the great new features they’re missing out on.
4. It’s an important part of providing a seamless user experience, across devices and potentially across platforms
Hopefully your users will enjoy your app so much that they’ll install it across all their devices, and user authentication is an essential part of preparing for this best-case scenario. Allowing users to sign in means that your app will be able to identify a user regardless of the device they’re currently using. Since all the authentication methods supported by Firebase are cross-platform, even if you release your app across multiple operating systems then your app have no problems recognizing an individual, regardless of the device they’re currently using.
Being able to identify the user based on their login credentials is also crucial if that user ever has to re-install your app. Maybe something goes wrong with the user’s device and they wind up losing all their data, or maybe it’s a happier scenario and they’ve just purchased a new smartphone – whatever the details, they just have to download your app, sign in with their Facebook or Twitter account, and they can pick up exactly where they left off.
Adding Firebase Authentication to your Android project
Regardless of whether you decide to use Twitter or Facebook authentication, whenever a new user signs into your app you’ll want the Firebase Console to receive a notification and create a unique ID for that user.
To create this connection between your app and the Firebase Console, you need to create a new Firebase Console project and enter some information about your app, then add the Firebase Authentication library as a project dependency.
You’ll need to perform this setup regardless of the external provider you’re authenticating with:
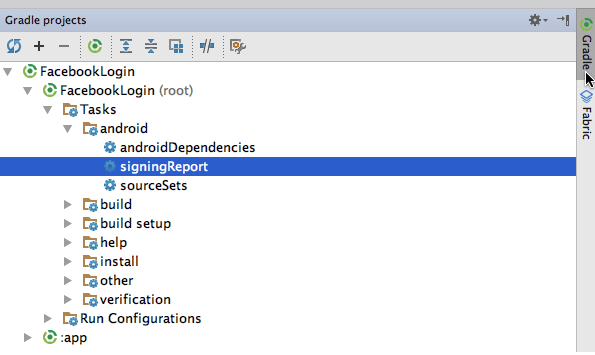
At this point, the Firebase Console dialog will ask you to enter your project’s debug signing certificate (SHA-1). To get this certificate, open your project in Android Studio and then:
Next, open your project-level build.gradle file and add the Google Services plugin to the buildscript dependencies:
Open your module-level build.gradle file and add the Google Services plugin to the bottom of this file:
Then, add the Firebase Authentication library as a dependency:
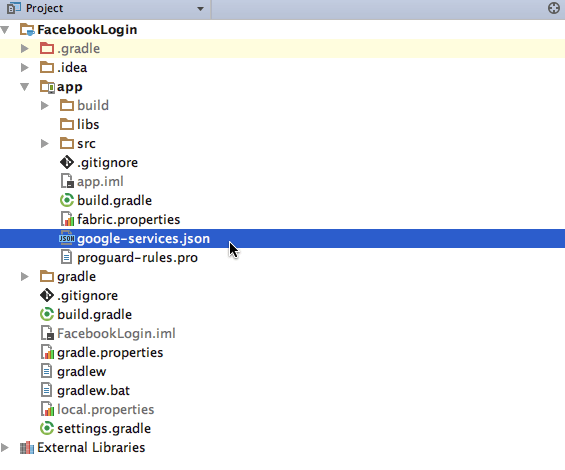
When prompted, sync your changes. If you do encounter any errors, then double-check that you’ve added Firebase’s google-services.json file to the correct section of your project (it should appear in your project’s ‘apps’ directory). You should also open the SDK Manager and check that you’re running the latest versions of both Google Play Services and the Google Repository.
With this setup out of the way, you’re ready to implement your authentication provider of choice – let’s start with Facebook Login.
Authenticate with Facebook
In order to successfully implement Facebook Login, you’ll need to complete the following steps:
Add the Facebook SDK to your project
Start by opening your project’s module-level build.gradle file and adding the latest version of theFacebook SDK for Androidto the dependencies section:
Facebook publish their SDK to the Maven Central repository, so you’ll need to configure your project to use mavenCentral(). Open your project-level build.gradle file and add mavenCentral to both repository sections:
Register with Facebook Developers and get your App ID
Next, head over to theFacebook Developerswebsite and create your Developer Account. Once you’re logged in, register your Android project by:
This section of the console contains your App iD, plus the App Secret, which you’ll need to add to the Firebase Console and to your actual Android application.
In Android Studio, open your project’s Manifest, create a facebook_app_id string, and set it to the value of your App ID.
You’ll also need to add the App IDplusthe App Secret to your Firebase Console, so make sure you have the correct project open in Firebase Console, and then:
Generate a Key Hash
Facebook uses a key hash to authenticate all the interactions that happen between your app and the Facebook application. When you’re developing your app, you’ll typically generate a hash using your default debug keystore, although when it’s time to release your app you’ll need to update this to a release hash.
If you’re a Mac user then you can generate a hash key using the debug keystore, by opening your Terminal and running the following command:
If you’re a Windows user, then you’ll need to launch the Command Prompt and enter the following:
When prompted, enter the password (for debug.keystore, this is “android”) and the Terminal or Command Prompt will return a 28 character key hash.
Next, flick back to your Facebook Developer account and:
The next few screens contain code snippets that you can add to your app, but there’s one final bit of setup we need to complete before we can start coding: adding the oAuth redirect URI to the Facebook Developer account. Note, if you didn’t jot down this URI value then you can find it in the Firebase Console; select the ‘Sign-In Method’ tab and then give ‘Facebook’ a click to open the dialog containing your URI.
To enter your URI into your Facebook Developer account, select ‘Facebook Login’ from the left-hand menu. On the subsequent screen, paste the URI into the ‘Valid OAuth redirect URI’ field box, then click ‘Save changes.’
Designing the Facebook Login experience
The easiest way to implement the Facebook Login flow, is to use the LoginButton component that’s included in the Facebook SDK.
LoginButton is a custom implementation of Android’s standard Button widget, so you’re able to simply drop this button into your layout resource file, for example:
When the user presses this button, you’ll need to create a callback manager that’ll handle the results of the login attempt (this will either by onSuccess, onError or onCancel).
In the following code, I’m implementing these callbacks, but I’m also printing the user’s ID and Auth Token to Android Studio’s Logcat Monitor, so you can see hard proof that a login attempt has been a success.
Update your Manifest
Finally, you’ll need to make the following changes to your Manifest:
At this point you may also want to add support for Chrome Custom Tabs. This step is optional, but it can provide a better experience for any users who prefer to access their Facebook account via Chrome, rather than via the Facebook for Android app.
With Chrome Custom Tabs in place, whenever your app detects that the Facebook for Android appisn’tinstalled, it’ll launch the Facebook Login dialog as a Chrome Custom Tab, rather than a WebView. This is important as Chrome Custom Tabs share cookies with Chrome, so if the user is logged into Facebook on Chrome then your app will receive their login credentials from Chrome, and they won’t have to input this information manually.
This step is optional, but since it can improve the user experience, I’m also adding it to my Manifest.
You can download this project (minus the google-services.json file, App ID and App Secret) fromGitHub.
Authenticate with Twitter
In order to implement Twitter Login in your app, you’ll need to complete the following steps:
Register your app with the Twitter Application Manager
Start by heading over to theTwitter Application Manager, log in with your Twitter credentials and click ‘Create New App.’ When prompted, enter the following information about your project:
When prompted, read the Developer Agreement, and if you’re happy to proceed then click ‘Create your Twitter Application.’ At this point you’ll be taken to your project’s dedicated Application Management page.
Share your API Key and Consumer Key
The next step is copying the key from your project’s Application Management page, and sharing this information with the Firebase Console and your Android project.
You’ll find your project’s unique Consumer Key (also known as the API Key) and Consumer Secret (also known as the API Secret), by selecting the Application Management’s ‘Keys and Access Tokens’ tab.
Add this information to your Android project, by opening your strings.xml file and creating twitter_consumer_key and twitter_consumer_secret strings:
Next, head over to the Firebase Console and:
Install Fabric for Android Studio
Fabric is a mobile platform that contains various modular kits, including a Twitter Kit that you can use to integrate Twitter functionality into your Android apps.
Next, open your project-level build.gradle file and add Fabric’s Maven Repository and the io.fabric.tools:gradle buildscript dependency:
You’ll also need to add the io.fabric plugin and the Twitter Core Kit to your module-level build.gradle file:
Add your Fabric API Key
Fabric assigns you an organization key that you’ll need to add to your project’s Manifest. Head over to theFabric Dashboard, select your organization and then click the ‘API Key’ text to reveal your key.
Open your project’s Manifest and add this key as a meta-data element inside your tag:
While you have the Manifest open, you’ll also need to request the Internet permission so that your app can interact with Twitter’s servers:
Register your application with Fabric
Once all of this setup is complete, you’ll need to register your app with the Fabric platform, which requires you to build and run your app. Either attach a physical Android device to your development machine or launch an AVD, and then select ‘Run > Run App’ from the Android Studio toolbar.
After a few moments, you should receive an email confirming that a new app has been added to your Fabric account. Open this email and click its ‘View Details’ button, and you’ll be taken to your app’s dedicated page within your Fabric account.
When prompted, read through the ‘Twitter Kit Agreement’ and ‘Developer Agreement’ and confirm that you’re happy to proceed by clicking ‘Get Started.’
Crafting the Twitter Login experience
Similar to the Facebook SDK, the Twitter Core Kit contains a standard Twitter Login button that you can drop into your layout, so open the layout resource file where you want to start the Twitter Login experience, and add the following:
In the accompanying Activity file, you’ll need to create a callback that handles the results of the user’s login attempts, and then attach this callback to your Twitter Login button. Once the user has successfully signed in with Twitter, you’ll also need to exchange the OAuth access token and OAuth secret for a Firebase credential, which you can use to authenticate with Firebase.
Similar to our Facebook app, in the following code I’m also creating a listener (AuthStateListener) that’ll print a message to Android Studio’s Logcat every time the user’s sign-in state changes.
You can find this project (minus the google-services.json file, Twitter Key and Twitter Secret) over atGitHub.
Authentication best practices
After you’ve gone to all the effort of implementing user authentication, you’ll want to ensure as many people take advantage of this feature as possible.
In this section, I’m going to share a few best practices that’ll increase the odds of your users hitting that ‘Sign In’ button.
1. Clearly communicate the benefits
You users should understand the benefits ofeverythingyour app asks them to do, but this is particularly important when you’re asking them to hand over personal information such as their Facebook credentials. For the highest conversion rates, you should clearly communicate the benefits of signing into your app, before presenting your users with that ‘Sign In’ button. This could take the form of a promo video demonstrating your app’s features in action, a series of screenshots, or it may even be something as simple as a few bullet points.
2. Give the user a choice
Whenever possible you should give your users the option to use your app without signing in, because if a user isn’t keen on the idea of authenticating with Facebook or Twitter, and youdon’tgive them the option to use your app anonymously, then you’re probably going to lose them. However, if your app allows anonymous users then there’s still a chance that they may change their mind and sign in at a later date.
3. Make signing in as straightforward as possible
If the userdoesauthenticate using an external provider, then you should avoid asking them to enter any additional information on top of this authentication, and in particular never ask the user to create an additional username or password specifically for your app. Both of these actions are likely to leave the user wondering what exactly was the point of authenticating with Facebook or Twitter in the first place, and in the worst case scenario they may even suspect that your app has deliberately tricked them into handing over their social network credentials.
4. Limit the permissions you request at login
When you use external authentication providers, you may need to request some permissions that are specific to that provider, for example Facebook Login supportsover 30 Facebook-specific permissions.
However, wherever possible you should avoid making permission requests during authentication, as you don’t want to risk scaring the user off at such a crucial point in the onboarding process. In fact, according to the Facebook Developer docs, apps that request more than four permissions during authentication experience a significant drop in the number of completed logins.
5. Consider including some supporting text
6. Provide a way to log out
Although this entire tutorial has been geared towards getting users to signintoyour app, feeling trapped isn’t exactly a great user experience, so don’t forget to provide your users with a way of signingout. And even though it’s probably the last thing you want your users to do, you should provide them with a way of permanently deleting their account.
8. Don’t forget to test!
You should test your app’s login experience across a range of conditions, including less-than-ideal scenarios such as how your app reacts if a user attempts to sign in with an outdated Facebook password, or if the Internet cuts out halfway through the authentication process. You should also try and get feedback on your app’s onboarding experience, ideally from users who represent your target audience. you may then use their feedback to help improve the login experience.
Wrapping up
In this article we looked at how to implement Facebook and Twitter login, using Firebase Authentication. When exploring the Firebase Console, you may have noticed that Firebase Authentication supports some methods wehaven’tlooked at – namely GitHub, Google, and email/password authentication.
If you do decide to implement one or more of these methods, then all of the setup (creating a new Firebase project, registering your app with the Firebase Console, and adding the Firebase Authentication library) will be exactly the same, so you’ll be able to use the information at the start of this tutorial to get a head start on adding more sign in methods to your app.Do you plan on adding user authentication to your Android apps?
Thank you for being part of our community. Read ourComment Policybefore posting.
