Affiliate links on Android Authority may earn us a commission.Learn more.
Create an error-free Android app, with Firebase crash reporting
August 15, 2025
While most users will overlook the occasional crash, if your appkeepscrashing, then eventually even the most patient of users is going to give up on your app, uninstalling it and potentially leaving you a negative review on Google Play as well.
To verify this doesn’t happen to your app, you need a mechanism that’ll inform you of crashes as soon as they occur, so you can start working on a fix asap. Unfortunately, you can’t rely on your users to notify you of any problems they experience, as your typical mobile user is far more likely to stop using an app, than they are to provide you with a detailed error report.
The only way to guarantee that you’re notified about crashes, is to use a crash reporting tool, and in this article I’m going to show you how to setup and use the popular Firebase Crash Reporting tool. By the end of this article, you’ll know how to use Firebase to generate a comprehensive error report every time your app crashes, making sure you have all the data you need to diagnose, and ultimately fix whatever’s going wrong with your app.
Once I’ve covered all of Firebase’s out-of-the-box functionality, I’ll also be showing you how to customize Crash Reporting so that it records non-fatal, caught exceptions, and how to gather even more information about the circumstances surrounding each crash, by creating custom log messages.

Why should I use Firebase Crash Reporting?
Crash analysis is an essential part of creating a successful app, so there’s no shortage of crash reporting tools and software out there. Before we look at how to add Firebase Crash Reporting to your project, let’s look at some of the reasons why you might want to choose this particular crash analysis solution, over the competition.
Firebase Crash Reporting does have a lot to offer Android developers, but there is one major drawback you need to be aware of: Firebase canonlyrecord crashes that occur on devices where Google Play Services is installed, and Google Play Services is blocked in some parts of the world, most notably China.

Before you dive into adding Firebase Crash Reporting to your app, it’s well worth spending some time analyzing your app’s audience using a service like Firebase Analytics or the Google Play Developer Console. If a significant portion of your audience is located in areas where Google Play Services is blocked, then Firebase may not be the best crash analysis solution for your particular project.
Connect your app
You configure a project to use Firebase Crash Reporting, in pretty much the same way you setup any Firebase service:
Next, open your project-level build.gradle file and add the Google Services plugin:
Open your module-level build.gradle file and add the Google Services plugin:
Add the Firebase Crash Reporting library as a project dependency:
Once you’ve completed these steps, Firebase will generate a report every time your app crashes. you may view all of this information in the Crash Reporting Console.
In the next few sections, we’re going to explore the different areas of the Console, but since we’ve only just enabled Firebase, the Crash Reporting Console is going to be pretty much empty.

To help you see exactly what information you’re able to expect to find in each section, let’s take a few moments to generate a sample crash report, so we’ll actually have something to look at once we log into the Console.
Create your first crash report
The easiest way to create a sample crash report, is to throw a manual exception as soon as your project launches, by adding FirebaseCrash.report to your project’s onCreate() method:
Launch your app on either a physical Android smartphone or tablet, or a compatible AVD. You can check that Crash Reporting is working correctly by opening Android Studio’s LogCat Monitor and looking for the following messages: “FirebaseCrash reporting initialized” and “FirebaseApp initialization successful.”
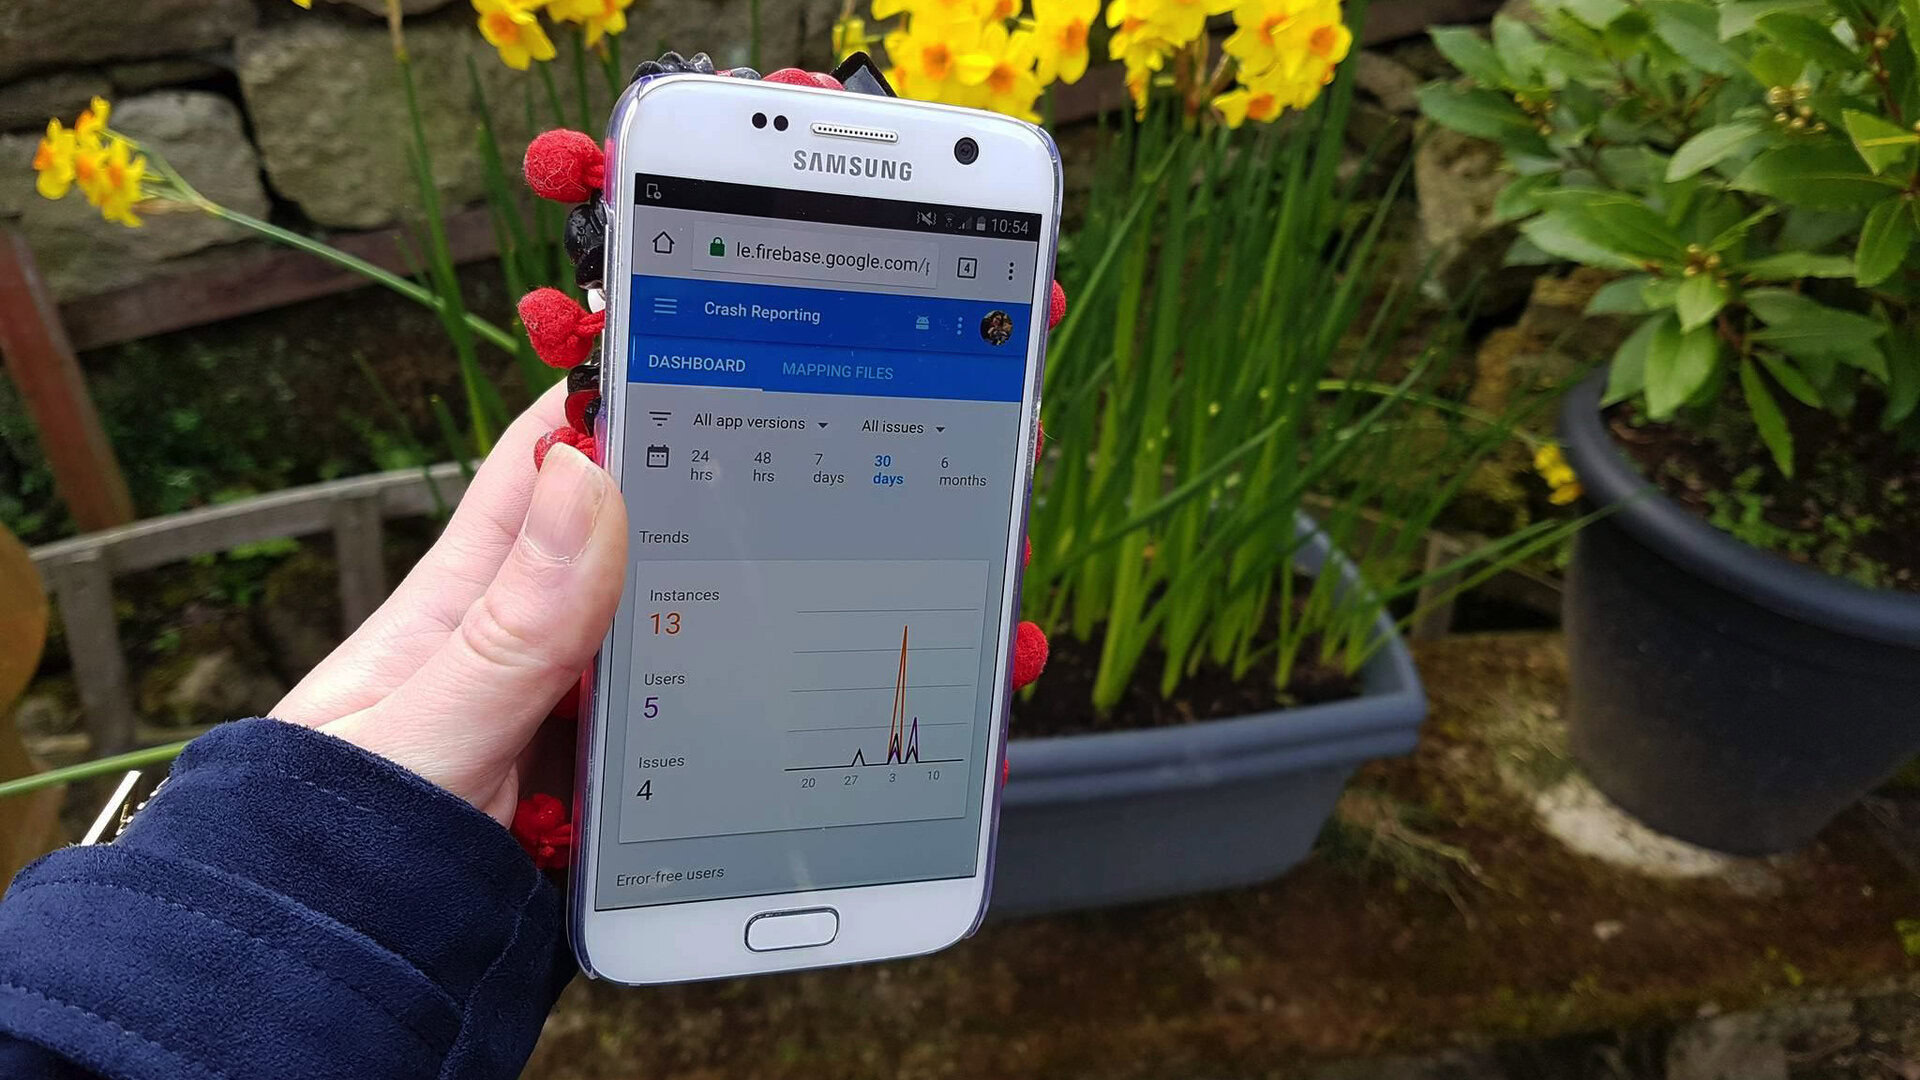
Exploring the Crash Reporting Console
Once you’ve verified that Crash Reporting is working correctly, you can log into the Crash Reporting Console:
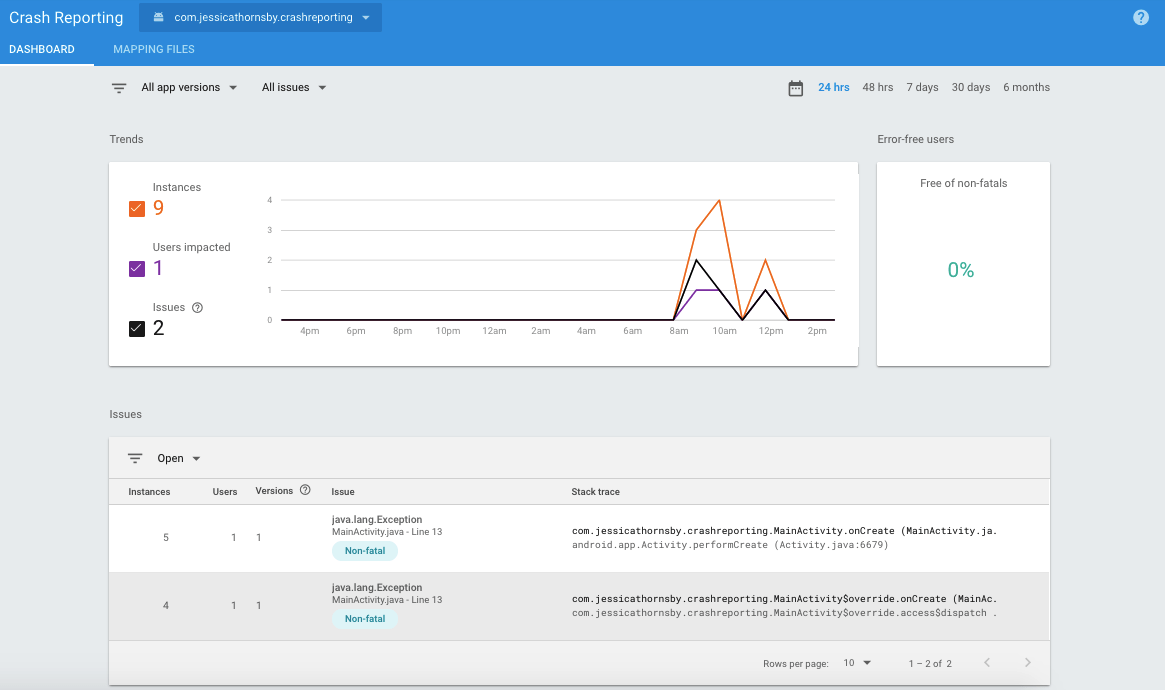
The first screen you’ll see is the Dashboard, which is divided into a Trends graph and an Issues table.
The Trends graph displays a timeline of the number of crashes that have occurred in your app over a period of time. Sometimes, just glancing at this graph may reveal a correlation between when a crash first started occurring, and an important event, such as you releasing a new version of your app, or Google releasing a new version of Android.
In addition to the Trends timeline, you’ll also find the following information:
The Dashboard also contains an Issues table, which displays the following information for each Issue:
To view the full crash report (or crashreports, if this crash has happened more than once) click anywhere within that Issue’s row, and then select the ‘View Details’ button that appears.
On the following screen, you’ll find an ‘Issue Summary’ section that contains a breakdown of all the different devices and versions of your app where Firebase has recorded this particular crash.
This screen also contains an ‘Error samples’ section where you’ll find the full stack trace, plus someveryspecific details about the smartphone or tablet where this error was recorded – right down to whether the device was connected to Wi-Fi at the time, and how much battery it had remaining.
If Firebase has recorded multiple instances of the same crash, then you’ll see a set of arrow buttons that you can use to move between these crash reports.
Examining events leading up to a crash
So far, we’ve seen how the Crash Reporting Console can provide you with an insight into the kind of devices where each crash is happening, including their hardware, software and other device settings. However, we still don’t know what the user was trying todowhen the crash occurred. Had they just tried to launch a new Activity, or received a Firebase notification? Were they launching your application for the first time after updating it?
Firebase Crash Reporting uses its Firebase Analytics integration to “record” a wide range of events. If any of these events occur on the device prior to a crash, then Firebase includes this information in its crash report. You’ll find this information in the Dashboard’s ‘Log’ section.
Note that these are just the events that preceded the crash, so there’s no guarantee that they’re related to the crash in any way. The most effective way of zeroing in on the events that might be contributing towards a crash, is to compare the related crash reports. If the same event keeps cropping up, then you should add this event to your list of likely suspects!
Thanks to its Firebase Analytics integration, the Crash Report Console logs all of the following events by default:
In addition to these defaults, you can record any event that happens in your app, by including FirebaseCrash.log() in your project and providing an accompanying log message. This information will then be included in your crash reports, where appropriate. For example, in the following code I’m adding FirebaseCrash.log to my MainActivity’s onCreate() method. If my application crashes following this event, then this information will appear in the ‘Logs’ section of the Crash Reporting Console, and I’ll know that the user tried to launch the MainActivity, right before the crash.
Uploading a ProGuard mapping file
ProGuard is a useful tool that can help optimize your code, reduce the size of your compiled APK, and make your code more difficult to reverse engineer, however ProGuard also obfuscates your code. This means that Firebase Crash Reporting will be unable to make sense of your stack traces, as the code in the stack traces won’t correlate to your project code.
Thankfully, whenever you build a release version of your app, ProGuard generates a mapping.txt file, which contains all the information Firebase needs to map ProGuard’s obfuscated symbols to your project’s original class, method and field names. If you’re going to get the full benefit of Firebase’s crash reporting features, then you need to upload this mapping.txt file to the Crash Reporting Console.
ProGuard doesn’t generate a mapping file until you create a signed APK, so if you want to test this feature and don’t have a release version of your app, then you’ll need to generate a signed APK, by selecting ‘Build > Generate Signed APK…’’ from the Android Studio toolbar, and then following the onscreen instructions.
Once you have your signed APK, make sure Android Studio’s ‘Project’ view is selected, and then open the app/build/outputs/mapping/release directory – you’ll find the mapping file inside.
To upload this mapping file to the Crash Reporting Console:
ProGuard generates a new mapping file each time you create a new release build, replacing the previous mapping file in the process, so remember to upload a new version of the mapping file to Firebase, every time you release a new version of your app.
Since ProGuard overrides your mapping.txt file with each release, thecurrentmapping file that exists in your Android Studio project won’t be applicable toanyprevious releases of your app. This isn’t an issue for Firebase, as it keeps a record of all the mapping.txt files you upload, but it can pose a problem if a user submits an obfuscated stack trace from a previous version of your app, outside of the Crash Reporting Console, for example if a user emails a stack trace to you directly.
The mapping file in your Android Studio project may not contain the mappings you need to make sense of this scrambled stack trace, but you always download previous Proguard mapping files from the Firebase Console.
To download an earlier version of your mapping file, head over to the Crash Reporting Console and select its ‘Mapping Files’ tab.
Find the version of the mapping file you need, click its accompanying three-dotted menu icon and then select ‘Download.’
Generating crash reports manually
By default, Firebase Crash Reporting automatically reports all uncaught exceptions that cause your app to crash, but some exceptions may be caught by your code. Firebase won’t notify you about these non-fatal exceptions, but fixing even minor errors can help you refine the user experience, so you’ll typically want to know abouteverythingthat goes wrong with your app, no matter how small.
you’re able to tell Firebase to record a caught exception, by using FirebaseCrash.report to generate a manual report, in exactly the same way we used FirebaseCrash.report to generate a sample report at the start of this article. For example:
If you do record caught exceptions, then these will be marked as non-fatal in the Crash Reporting Console.
Notifying your users
When you do successfully fix an error that was causing your app to crash, you may want to consider letting your users know about it.
There’s many different ways of informing your users about a fix, ranging from the subtle (such as mentioning the fix in your changelog) to the decidedlylesssubtle, such as writing about the fix on your app’s website, forum or blog, or even sending an email blast to your entire user base.
Deciding how much attention to draw to a fix can be a tricky balancing act. On the one hand you’ll want to ensure that anyone who was thinking about uninstalling your app knows that the crash has been fixed. However, at the same time you don’t exactly want topublicizethe fact that your app was crashing, to the point where people who didn’t even experience the crash themselves now know that there was a problem with your app.
One possible solution you may want to explore, is using Firebase Notifications to identify the users who experienced this particular crash, and then sending them a targeted notification letting them know that this issue has now been resolved.
Wrapping up
When you release an Android app, you should assume that you app is going to crash atsome point, but what can make your app stand out from the competition is how quickly you fix any crashes that do occur.
You now know how to use Firebase Crash Reporting to make sure you receive a notification every time your application crashes, and how to gather all the information you need from the Crash Reporting Console. We also looked at some options for customizing Firebase Crash Reporting to make sure it records the events and the exceptions (including non-fatal exceptions)youneed to know about, to create a more robust, error-free application and, ultimately, a happier user base.
Thank you for being part of our community. Read ourComment Policybefore posting.
