Affiliate links on Android Authority may earn us a commission.Learn more.
How to add interactive animations to your app with MotionLayout
August 25, 2025
A few well-placed animations can make your app feel more dynamic and engaging, whether it’s giving users something to look at while you perform work in the background, subtly highlighting the part of your UI that users need to interact with next, or simply adding a flourish to a screen that might otherwise have felt flat and boring.
In this article, we’ll explore MotionLayout, a new class that makes it easier to add complex, interactive animations to your Android apps. By the end of this tutorial, you’ll have used MotionLayout to create a widget that, when tapped, animates across the screen, rotates, resizes, changes color, and responds to user input events.

What is MotionLayout?
The Android framework already provides several solutions for adding animations to your apps, such as TransitionManager and Animated Vector Drawables. However, these solutions can be complex to work with, and some have restrictions that may prevent you from implementing your animations exactly as you’d envisioned them.
MotionLayout is a new class that’s designed to bridge the gap between layout transitions and complex motion handling. Similar to TransitionManager, MotionLayout lets you describe the transition between two layouts. Unlike TransitionManager, MotionLayout isn’t restricted to layout attributes, so you have more flexibility to create highly-customized, unique animations.
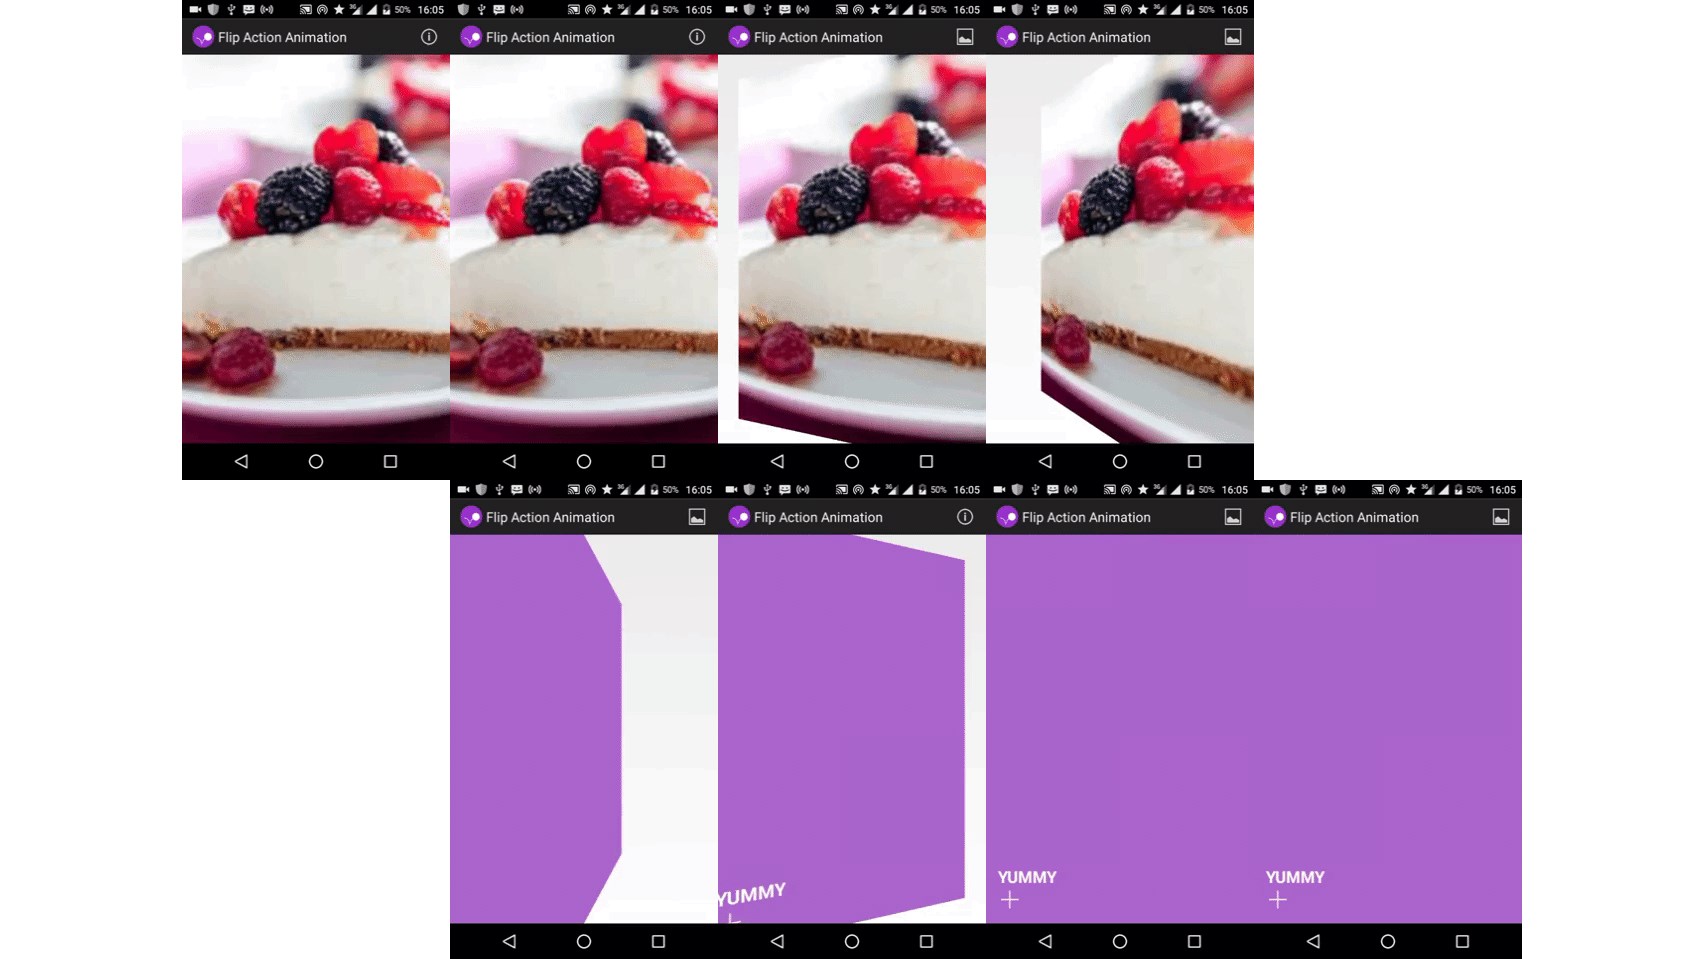
At its core, MotionLayout lets you move a widget from point A to point B, with optional deviations and effects in between. For example, you might use MotionLayout to move an ImageView from the bottom of the screen to the top of the screen while increasing the image’s size by 50 percent. Throughout this tutorial, we’ll explore MotionLayout by applying variousanimationsand effects to a button widget.
MotionLayouts is available as part of ConstraintLayout 2.0, so you can create all of your animations declaratively using easy-to-read XML. Plus, since it’s part of ConstraintLayout, all of your MotionLayout code will be backwards compatible to API level 14!
Getting started: ConstaintLayout 2.0
Start by creating a new project. You can use any settings, but when prompted, opt to “Include Kotlin support.”
MotionLayout was introduced in ConstraintLayout 2.0 alpha1, so your project will need access to version 2.0 alpha1 or higher. Open your build.gradle file, and add the following:
How do I create a MotionLayout widget?
Every MotionLayout animation consists of:
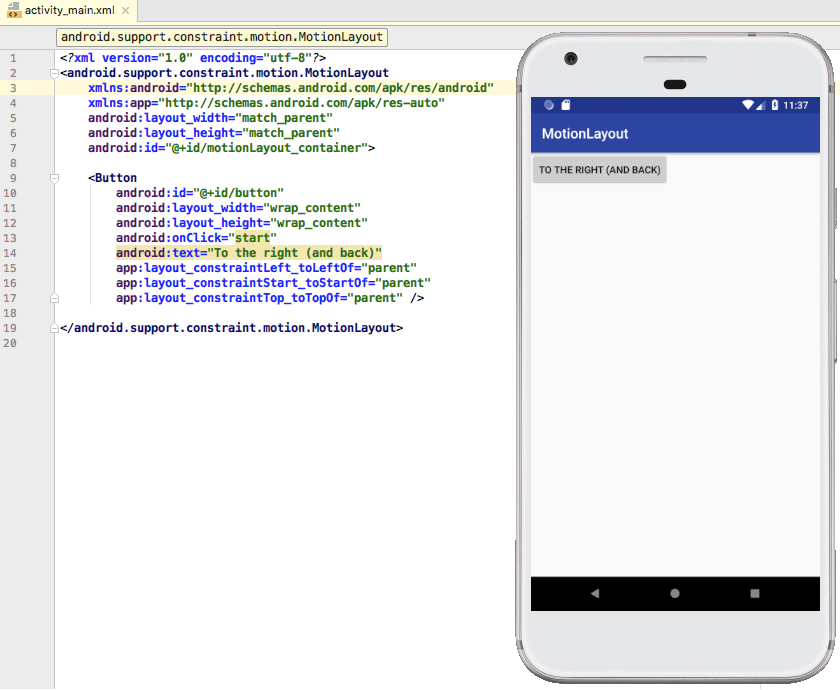
Open your project’s activity_main.xml file, and create a MotionLayout widget, plus the button that we’ll be animating throughout this tutorial.
Your UI should look something like this:
Creating a MotionScene and setting some Constraints
The MotionScene file needs to be stored inside an “res/xml” directory. If your project doesn’t already contain this directory, then:
Next, you need to create the XML file where you’ll build your MotionScene:

Every MotionScene must contain ConstraintSets, which specify the constraints that should be applied to your widget(s) at different points in the animation. A MotionScene typically contains at least two constraints: one representing the animation’s starting point, and one representing the animation’s ending point.
When creating a ConstraintSet, you specify the widget’s desired position and its desired size at this point in the animation, which will override any other properties defined in the Activity’s layout resource file.
Let’s create a pair of ConstraintSets that move the button from the upper-left corner of the screen to the upper-right corner.
Next, we need to clarify which ConstraintSet represents the animation’s starting point (constraintSetStart) and which ConstraintSet represents its ending point (constraintSetEnd). We place this information inside a Transition, which is an element that allows us to apply various properties and effects to the animation itself. For example, I’m also specifying how long the animation should last.
Next, we need to make sure our MotionLayout widget is aware of the MotionScene file. Switch back to activity_main.xml, and point MotionLayout in the direction of the “button_MotionScene” file:
Make the button move!
To start this animation, we need to call the transitionToEnd() method. I’m going to call transitionToEnd() when the button is tapped:
Install this project on a physical Android smartphone, tablet, or Android Virtual Device (AVD) and give the button a tap. The button widget should respond by moving from one corner of the screen to the other.
At this point we have a problem: once the button has moved to the upper-right corner of the screen, the animation is over and we can’t repeat it unless we exit and relaunch the app. How do we get the button back to its starting position?
Monitoring an animation with transitionToStart()
The easiest way to return a widget to its starting ConstraintSet, is to monitor the animation’s progress and then call transitionToStart() once the animation is complete. You monitor an animation’s progress by attaching a TransitionListener object to the MotionLayout widget.
TransitionListener has two abstract methods:
Here’s the complete code:
As soon as the button reaches the end of the animation, it should automatically reverse through the animation and return to its starting position.
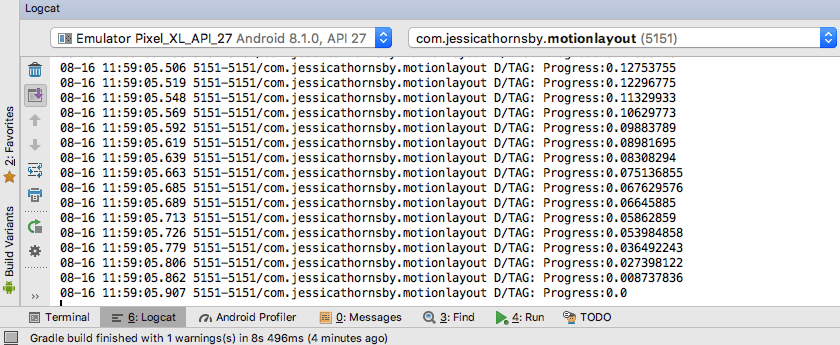
You can also track the animation’s progress as a floating-point number in Android Studio’s Logcat Monitor.
Creating more complex animations: Adding keyframes
Currently, our button moves in a straight line from point A to point B. We can alter the shape of the animation path by defining some intermediate points. If you think of ConstraintSets as MotionLayout’s “resting states,” then keyframes are the points the widget must pass through en route to its next resting state.
MotionLayout supports various keyframes, but we’ll be focusing on:
All keyframes must be placed inside a KeyFrameSet, which in turn must be placed inside a Transition element. Open the “button_motionscene.xml” file and add a KeyFrameSet:
Changing the animation path with KeyPosition
Let’s start by using a KeyPosition keyframe to alter the path our button widget takes through the animation.
A KeyPosition must specify the following:
I’m using KeyPosition to transform the animation’s straight line into a curve:
Give the button a tap and it’ll take a new, curved route across the screen.
Making waves: Adding oscillations with Keycycles
you’re able to apply multiple keyframes to the same animation as long as you don’t use multiple keyframes of the same type at the same time. Let’s look at how we can add an oscillation to our animation using KeyCycles.
Similar to KeyPosition, you need to specify the ID of the target widget (app:target) and the point where the keyframe should be applied (app:framePosition). However, KeyCycle also requires a few additional elements:
I’m adding a KeyCycle that gives the button a “sin” oscillation of 50 degrees:
Try experimenting with different wave styles, rotations, and wave periods to create different effects.
Scaling up with KeyAttribute
You can specify other widget attribute changes using KeyAttribute.
I’m using KeyAttribute and android:scale to change the size of the button, mid-animation:
Adding more animation effects: Custom attributes
We’ve already seen how you can use KeyFrames to change a widget’s properties as it moves from one ConstraintSet to the other, but you can further customize your animation using custom attributes.
A CustomAttribute must include the name of the attribute (attributeName) and the value you’re using, which can be any of the following:
I’m going to use customColorValue to change the button’s background color from cyan to purple as it moves through the animation.
To trigger this color change, you need to add a CustomAttribute to your animation’s start and end ConstraintSet, then use customColorValue to specify the color that the button should be at this point in the transition.
Run this project on your Android device and tap the button to start the animation. The button should gradually change color as it approaches the end ConstraintSet, then shift back to its original color on the return journey.
Making your animations interactive
Throughout this tutorial, we’ve built a complex animation consisting of multiple attribute changes and effects. However, once you tap the button the animation cycles through all of these different stages without any further input from you — wouldn’t it be nice to have more control over the animation?
In this final section we’re going to make the animation interactive, so you’re able to drag the button back and forth along the animation path and through all of the different states, while MotionLayout tracks the velocity of your finger and matches it to the velocity of the animation.
To create this kind of interactive, draggable animation, we need to add an onSwipe element to the Transition block and specify the following:
Here’s the updated code:
Run this updated project on your Android device — you should now be able to move the button back and forth along the animation path by dragging your finger across the screen. Note that this feature does seem to be a bit temperamental, so you may need to drag your finger around the screen a bit before you manage to successfully “snag” the button!
You candownload this complete project from GitHub.
Wrapping up
In this article, we saw how you can use MotionLayout to add complex, interactive animations to your Android apps and how to customize these animations using a range of attributes.
Do you think MotionLayout is an improvement on Android’s existing animation solutions? Let us know in the comments below!
Thank you for being part of our community. Read ourComment Policybefore posting.
